4.12. Creating dialogs in SMITER
There are prepared classes for writing dialogs in SMITER that may ease the writing of a dialog. Otherwise to create a dialog simply use the PyQt5 module for creating the GUI and provide corresponding functions that are called when using the dialog.
In this howto we will write a simple dialog that accepts a input field and upon clicking Apply it will open a message box and printing the input string. We will also use the prepared base classes for writing simple dialogs.
4.12.1. Creating the file
Create a file example_dialog.py in the smiter/SMITER/src/Dialogs
directory. The naming convention for the files is Snake Case.
4.12.2. Writing the code
The base code:
from SMITER_dialogs import Dialog


class ExampleDialog(Dialog):
    def __init__(self, parent=None):
        super(ExampleDialog, self).__init__(parent)

if __name__ == '__main__':
    from qtsalome import QApplication

    # Check if there already is an instance of QApplication
    app = QApplication.instance()
    execute = False

    if app is None:
        # Create an instance of QApplication
        execute = True
        app = QApplication([])

    # Instance the dialog and show it.
    d = ExampleDialog()
    d.show()

    if execute:
        # Run only if there was no QApplication instance found.
        app.exec_()
At the top we import the SMITER_dialogs.Dialog class from which our
ExampleDialog will inherit.
The initialize function always takes first argument as a parent (optional) and
immediately initializes the inherited class by calling super, which takes
our dialog class name as argument and a reference to itself. So if you change
the class name to SomeDifferentDialog the super function would be
super(SomeDifferentDialog, self).__init__(parent).
That’s it for the dialog and on the bottom we have a conditional code block
used for testing the dialog by running it outside or inside of SMITER. So
far this takes most of the example and should be of no concern to us.
4.12.3. Running the code outside of SMITER
4.12.3.1. Linux
In Linux you can run the dialog, to see if the layout is correct. To do
that the SMITER environment must be loaded, which is done by sourcing
the env_launch.sh file in SMITER top directory.
# Go to SMITER top directory
cd smiter
# Generate the env_launch.sh file
./sat environ smiter
# Load the env_launch.sh
source env_launch.sh
# Run the example_dialog.py
python SMITER/src/Dialogs/example_dialog.py
4.12.3.2. Windows
In Windows, if you wish to test how the Dialog looks, you will have to run
it from SMITER. Run SMITER and then in the python console write
exec(open('C:\path\to\smiter\SMITER\src\Dialogs\example_dialog.py').read())
4.12.3.3. Result
The following dialog should pop up.
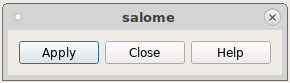
We can click on Apply, Cancel, Help, and only the Cancel will actually do something, that is, closing the dialog.
4.12.4. Populating the code further
Now we change the dialogs name to Example dialog. After the line with the
super statement, we will use self.setWindowTitle('Example dialog').
def __init__(self, parent=None):
   super(ExampleDialog, self).__init__(parent)
   self.setWindowTitle('Example dialog')
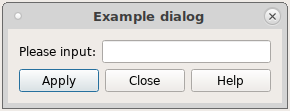
Next step we will add an input field. For this we will use a method
called addSpecialWidgets to our ExampleDialog class.
def addSpecialWidgets(self):
    self.inputField = self.addLineEdit('Please input:')
If we rerun the dialog, we will get
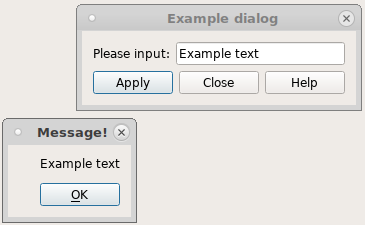
Next step is to process what has been given to the dialog. For this purpose,
adding parameters to the dialog and clicking Apply, we use the
method onAppl.
def onApply(self):
    # Using the variable self.inputField we extract the text.
    text = self.inputField.text()

    # Now we will display the message with the use of
    # ``self.displayMessage``, which takes a title and text for its
    # arguments.
    self.displayMessage('Message!', text)
Now if we rerun the dialog and write something to the input field and click on Apply, we should get
4.12.5. Resulting code
from SMITER_dialogs import Dialog

class ExampleDialog(Dialog):
    def __init__(self, parent=None):
        super(ExampleDialog, self).__init__(parent)
        self.setWindowTitle('Example dialog')

    def addSpecialWidgets(self):
        self.inputField = self.addLineEdit('Please input:')

    def onApply(self):
        # Using the variable self.inputField we extract the text.
        text = self.inputField.text()

        # Now we will display the message with the use of
        # ``self.displayMessage``, which takes a title and text for its
        # arguments.
        self.displayMessage('Message!', text)


if __name__ == '__main__':
    from qtsalome import QApplication

    # Check if there already is an instance of QApplication
    app = QApplication.instance()
    execute = False

    if app is None:
        # Create an instance of QApplication
        execute = True
        app = QApplication([])

    # Instance the dialog and show it.
    d = ExampleDialog()
    d.show()

    if execute:
        # Run only if there was no QApplication instance found.
        app.exec_()
Note
For more information on the base dialog check SMITER dialog
4.12.6. Writing more specific dialogs
If the base dialog does not provide enough functionality, i.e. you wish multiple layouts, showing images and so on, we can of course write our own dialogs or extend the base class.
4.12.6.1. Minimum requirements for a dialog
The dialog must be written as a python class that inherits the QDialog or
any other derivites of the QDialog class. It must contains the standard
buttons box, for example Apply, Cancel and
Help. The dialog must contain a function for each of the before
mentioned buttons.
An example of such a dialog:
from qtsalome import (QDialog, QGridLayout, QHBoxLayout, QVBoxLayout,
    QFormLayout, QDialogButtonBox, QLineEdit, QPlainTextEdit, QDialogButtonBox,
    QLabel, QPixmap, pyqtSlot, QMessageBox)
# Do not import salome.geom or salome.smesh here. Not even numpy. This avoids
# the initialization of the said modules when SMITER starts and prolongs the
# activation time.


class MyCustomDialog(QDialog):
    def __init__(self, parent=None):
        super(MyCustomDialog, self).__init__(parent)
        self.setWindowTitle('Example custom dialog')
        self.setupUi()

    def setupUi(self):
        # Setting up the main layout
        layout = QGridLayout()

        # Having 3 sublayouts.
        # +-------------------+---------------------+
        # |    Upper left     |     Upper right     |
        # |       layout      |       layout        |
        # |                   |                     |
        # |-------------------+---------------------+
        # |                                         |
        # |              Lower layout               |
        # |                                         |
        # +-----------------------------------------+

        # Using form layout for simple ``Label : Input field`` widgets.
        # Also contains the ``Apply``, ``Cancel`` and ``Help`` buttons.
        layoutUpperLeft = QFormLayout()

        self.inputLineEdit = QLineEdit('')
        layoutUpperLeft.addRow('Your input', QLineEdit())

        # Use the QDialogButtonBox for adding standard buttons
        buttons = QDialogButtonBox(QDialogButtonBox.Apply |
            QDialogButtonBox.Cancel | QDialogButtonBox.Help)

        # Connect the standard buttons signals
        buttons.accepted.connect(self.onApply)
        buttons.rejected.connect(self.onCancel)
        buttons.helpRequested.connect(self.onHelp)

        layoutUpperLeft.addWidget(buttons)

        # Vertical layout for stacking widgets vertically
        layoutUpperRight = QVBoxLayout()

        self.textEdit = QPlainTextEdit()
        layoutUpperRight.addWidget(self.textEdit)

        # Horizontal layout for stacking widgets horizontally
        layoutLower = QHBoxLayout()

        # Adding two QLabel widgets with images
        image1 = QLabel()
        # Load the image into QPixMap. The image is loaded from Qt resources.
        # To see how to add images
        pixmap = QPixmap(':/SMITER/example_dialog_image1.png')
        image1.setPixmap(pixmap)

        # Do the same
        image2 = QLabel()
        pixmap = QPixmap(':/SMITER/example_dialog_image2.png')
        image2.setPixmap(pixmap)

        layoutLower.addWidget(image1)
        layoutLower.addWidget(image2)

        # Now put the layouts into the main layout

        layout.addLayout(layoutUpperLeft, 0, 0)
        layout.addLayout(layoutUpperRight, 0, 1)

        # The lower layout will expand over columns, thats why we add the
        # additional 1, -1 argument
        layout.addLayout(layoutLower, 1, 0, 1, -1)

        # Set the main layout
        self.setLayout(layout)

    @pyqtSlot()
    def onHelp(self):
        """Display a help message regarding this dialog.
        """
        helpMsg = "This is an example of a custom dialog"
        QMessageBox.information(self, 'Information', helpMsg)

    @pyqtSlot()
    def onApply(self):
        """Do something with the inputs of the dialog here. If you need to
        import modules, such as salome.geom or salome.smesh, do it here and
        not on the top of the file.

        It is preferred to get the input values from the widgets and then call
        a separate function which accepts the input values and do something
        with them. Also, again, it is mandatory if you need certain modules
        such as geompy, smesh or even numpy, import them in the function and
        not on top of the file!

        .. code-block:: python

           from salome.geom import geomBuilder
           geompy = geomBuilder.New()
           # or
           from salome.smesh import smeshBuilder
           sb = smeshBuilder.New()

           # Now ei
        """
        # Do something with the inputs of the dialog
        lineEditText = self.inputLineEdit.text()
        print(lineEditText)

        plainTextEditText = self.textEdit.toPlainText()
        print(plainTextEditText)

    @pyqtSlot()
    def onCancel(self):
        """Either just close the dialog or perform additional actions.
        """
        self.close()

if __name__ == '__main__':
    from qtsalome import QApplication

    # Check if there already is an instance of QApplication
    app = QApplication.instance()
    execute = False

    if app is None:
        # Create an instance of QApplication
        execute = True
        app = QApplication([])

    # Instance the dialog and show it.
    d = MyCustomDialog()
    d.show()

    if execute:
        # Run only if there was no QApplication instance found.
        app.exec_()
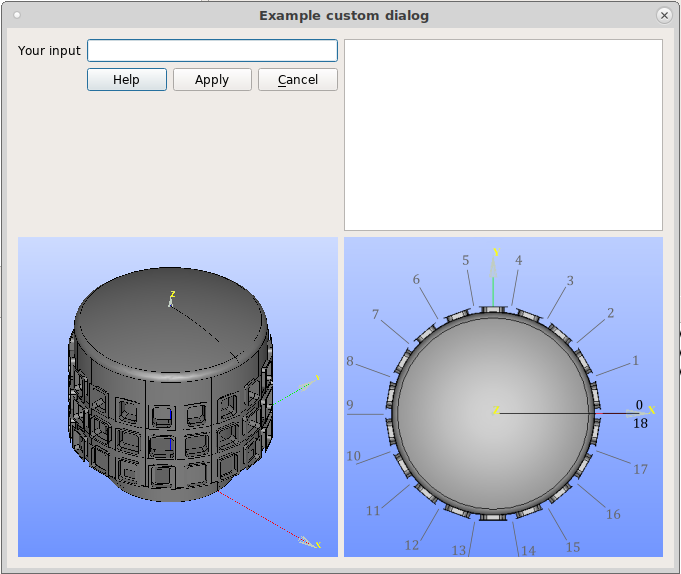
If we run this dialog in SMITER as desribed in SMITER dialog the dialog will look like this.
Note
The code snippets are also available in smiter/SMITER/src/Dialogs
directory.
4.12.7. Adding images to Qt resource system
Images and other multimedia files can be added to the Qt resource system.
Specifically, if we want to use images in our dialogs, we should avoid
embedding them into the python files itself, but rather add them to the
smiter/SMITER/src/Dialogs/images directory and editing the
dialog_images.qrc.
The .qrc file is an XML file, in which we can specify a namespace and
assign images to the namespace. If we look at the content of
smiter/SMITER/src/Dialogs/images/dialog_images.qrc.
<RCC>
  <qresource prefix="SMITER">
    <file>example_dialog_image1.png</file>
    <file>example_dialog_image2.png</file>
  </qresource>
</RCC>
We see that there is a prefix SMITER then a list of image file names,
enclosed with the <file></file> markups. That is all what we need to do,
and if we want to access or display these images inside PyQt, we simple write
the path of the image inside the Qt resource system, i.e.
:/SMITER/example_dialog_image1.png. Example code:
from qtsalome import QLabel, QPixmap

label = QLabel()
# Load the image
pixmap = QPixmap(':/SMITER/example_dialog_image1.png')
# Set the pixmap
label.setPixmap(pixmap)
# The image is ready to be displayed.