4.7. Remote desktop with VirtualGL
For large SMITER studies and Linux cluster access to visualisation nodes from “thin clients” there are several solution availble. All are based on VirtualGL technology that utilizes hardware OpenGL rendering. Therefore, visualisation nodes need to have NVidia graphics card (GPU) installed and configured for GPU access by users.
- Commercial solutions:
Usually, there is some effort needed by the user to achieve VirtualGL destop if not using some of the commercial solutions. To ease this desktop setup there are some custom (open source) solutions for automatic desktop creation: - https://www.massive.org.au/userguide/cluster-instructions/strudel - https://gitlab.version.fz-juelich.de/vis/strudel - Remote Connection Manager
These remote VNC desktop connections are actually doing SSH connections to visualisation node and can be obtained also manually. See NVIDIA white paper on Remote Visualization on Server-Class Tesla GPUs for insight of the technology.
There are possibilites to do such node allocation and use of TurboVNC with VirtualGL in “manual” by firstly allowing access to the node and then running VNC server on it. The following example shows how to setup an interactive session with SLURM batch manager to node with GPU, establishing VNC server and connecting to it with remote client.
4.7.1. Allowing remote access to compute nodes
When user gets allocation to the visualisation compute node with SLURM workload manager command:
$ salloc --nodes=1 -t 1:00:00 -A m.2017-1-487
$ echo $SLURM_NODELIST
t01n3
Administrators can allow login to compute node with pam_slurm.so
setup such as:
$ cat /etc/pam.d/sshd
   #%PAM-1.0
   #
   auth       include      system-auth
   auth       optional     pam_afs_session.so minimum_uid=500 debug=1 program=/    usr/heimdal/bin/afslog
   account    required     pam_nologin.so
   account    required     pam_slurm.so
   account    include      system-auth
   password   include      system-auth
   session    optional     pam_keyinit.so force revoke
   session    required     pam_limits.so
   session    include      system-auth
   session        required     pam_env.so conffile=/etc/security/ssh_pam_env.co    nf
   session    required     pam_loginuid.so
   session    required     pam_afs_session.so minimum_uid=500 debug=1 program=/    usr/heimdal/bin/afslog
It should be enough to add this line to the sshd pam config (and
possibly removing existing restrictive pam modules like pam_access
if they are enabled). It is also strongly suggested looking at
pam_slurm_adopt that puts the ssh-initiated session in the same
process containment as the rest of the job. This is especially
important if one share nodes with other jobs.
4.7.2. Manual setup of the VNC server on the node with VirtualGL
On a compute node with VirtualGL installed one needs to create TurboVNC server to which users can then connect through a SSH tunnel as described in the follwing script:
#!/bin/sh
set -x
XDISPLAY=:0
XVNCDISPLAY=:1
export DISPLAY=$XDISPLAY
Xorg $XDISPLAY -nolisten tcp &
sleep 5
/opt/TurboVNC/bin/Xvnc -securitytypes None -localhost -nolisten tcp \
    -geometry 1920x1080 \
    -fp /usr/share/X11/fonts/misc $XVNCDISPLAY &
sleep 5
/usr/bin/mwm -display :1 &
/usr/bin/xterm -display :1 &
/usr/bin/xsetroot -gray -display :1 &
cn=$(hostname)
cat << __EOF__
Use the following command on your local machine:
export VNC_VIA_CMD='/usr/bin/ssh -f -L "\$L":"\$H":"\$R" "${USER}@\$G" "sleep 2    0"'
vncviewer -via ${cn} localhost:1
__EOF__
On local linux one then type command:
leon@dell5520a:~/smiter$ export VNC_VIA_CMD='/usr/bin/ssh -f -L "$L":"$H":"$R" "kosl@$G" "sleep 20"'
leon@dell5520a:~/smiter$ vncviewer -via t02n47.pdc.kth.se localhost:1
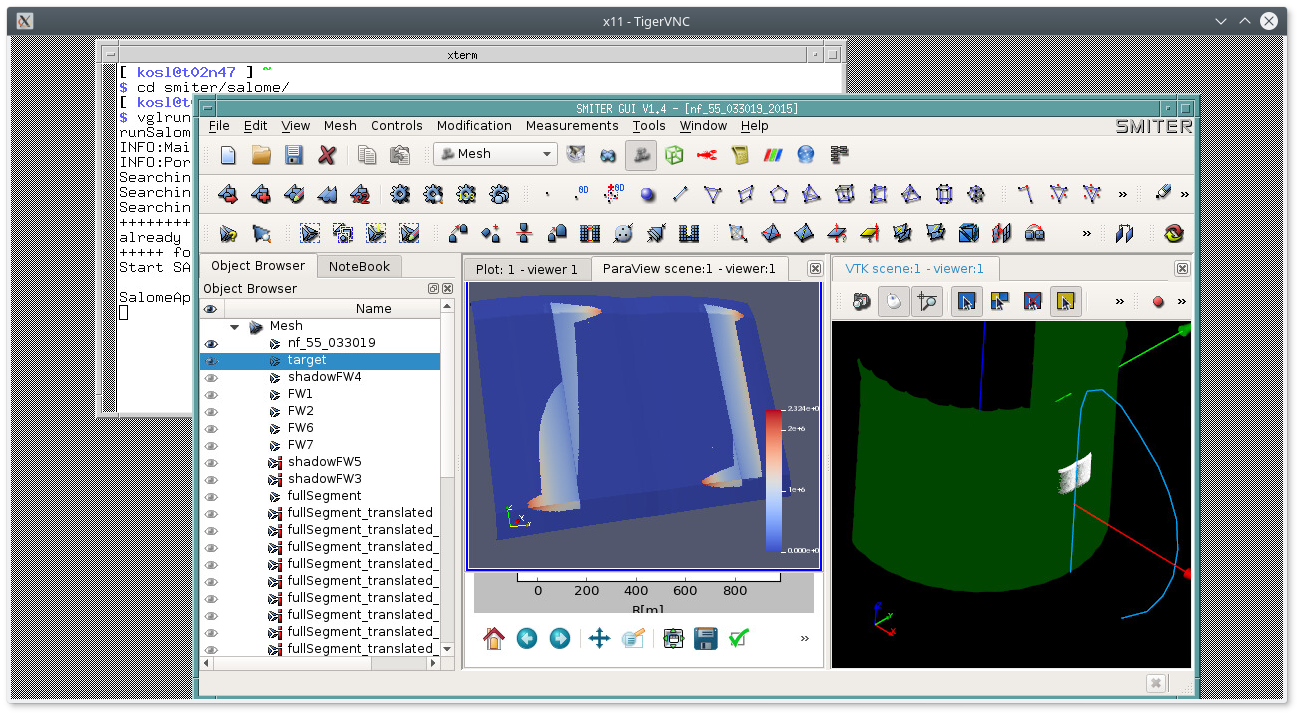
and when TigerVNC or TurboVNC desktop appears in terminal window issues:
[ kosl@t02n47 ] ~
$ cd smiter/salome/
[ kosl@t02n47 ] ~/smiter/salome
$ vglrun ./smiter
to get the folowing desktop when opening and running one study.
4.7.3. GPU memory usage
Simple cases are very light in terms of GPU memory usage. Inres1 case takes arounf 10MB of GPU memory as shown wtith the following command available with Nvidia cards:
$ nvidia-smi
+-------------------------------------------------------------+
| Processes:                                       GPU Memory |
|  GPU       PID   Type   Process name             Usage      |
|=============================================================|
|    0     19699      G   Xorg                          41MiB |
|    0     23691      G   SALOME_Session_Server         10MiB |
+-------------------------------------------------------------+
Larger cases such as NF55 can take 1GB of memory.
Shadow mesh alone with 2.5 milions triangles the memory usage is:
+------------------------------------------------------------+
| Processes:                                      GPU Memory |
|  GPU       PID   Type   Process name            Usage      |
|============================================================|
|    0     19699      G   Xorg                         42MiB |
|    0     20484      G   glxgears                      4MiB |
|    0     20643      G   SALOME_Session_Server       237MiB |
+------------------------------------------------------------+
When loading all NF55 meshes in memory it consumes 1GB of GPU memory and aroung 5GB physical (system) and 7GB virtual memory.
+------------------------------------------------------------+
| Processes:                                      GPU Memory |
|  GPU       PID   Type   Process name            Usage      |
|============================================================|
|    0     19699      G   Xorg                         41MiB |
|    0     20484      G   glxgears                      4MiB |
|    0     20643      G   SALOME_Session_Server      1031MiB |
+------------------------------------------------------------+
Overall, for single user a graphics card with 2GB of memory should be sufficient for normal use.
4.7.4. Seting up VirtualGL server
We recommend lightdm X11 display manager to be enabled and the rest disabled
accordingly with systemctl enable/disable <display manager>.service
commands. For Example when everything is correct then one can check with:
# systemctl status lightdm.service
* lightdm.service - Light Display Manager
Loaded: loaded (/usr/lib/systemd/system/lightdm.service; enabled; vendor preset: enabled)
   Active: active (running) since Mon 2018-09-10 13:52:10 CEST; 3s ago
     Docs: man:lightdm(1)
 Main PID: 25106 (lightdm)
   CGroup: /system.slice/lightdm.service
       +- /usr/sbin/lightdm
       +- /usr/bin/X -core -noreset :0 -seat seat0 -auth /var/run/lightdm/root/:0 -nolisten tcp vt1 -novtswitch -background none
and then check that:
# systemctl get-default
returns graphical.target otherwise we need to enable with:
# systemctl set-default graphical.target
to be persistent during reboots.
If having multiple NVIDIA graphics cards then the example config from
io-ls-titan.iter.org in
file:smiter/salome/examples/virtualgl/xorg.conf shows how to setup
/etc/X11/xorg.conf.
4.7.5. Remote access to compute node with VNC on Microsoft Windows
To connect to a remote compute node with Microsoft Windows, the following software has to be installed:
To install the software simply go to the site and go to the download site. Then download the correct 32 or 64 bit version and install it.
Or click on the following links to the MSI installer files.
4.7.5.1. Setting up VNC server using PuTTY
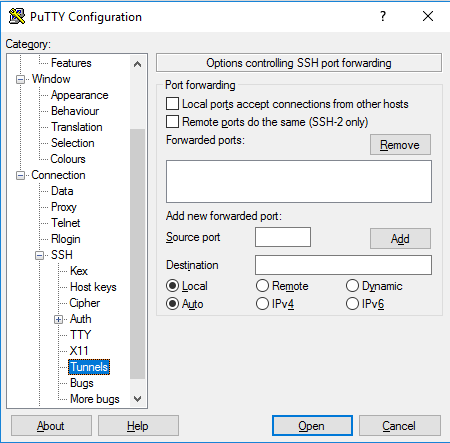
First a profile has to be set with the correct settings in PuTTY. With this we
will enable a SSH tunnel to one of the hpc-login*.iter.org login nodes.
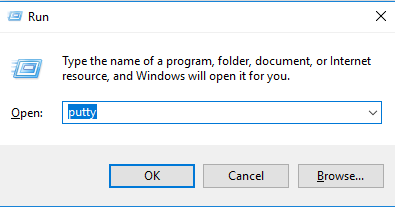
Run PuTTY by pressing Win-r and writing putty into the dialog.
This will open PuTTY. Traverse to .
Set the Source port to 5900 and Destination to
hpc-login8.iter.org:5902.
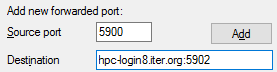
Click on Add. This creates a new entry in Forwarded ports and
the entry will be seen as L5900 hpc-login8.iter.org:5902.
Now head to the section, which is located at the top in the left scroll area.
Set the Host name (or IP address) to $USER@hpc-login8.iter.org where
$USER is the username on the login node. In this case the value for
$USER is simicg.

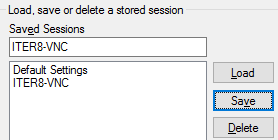
Now save the settings by setting Saved Sessions to ITER8-VNC
and then clicking Save. The name for the session can generally be
anything. This saves the settings for the session for future use.
Click on Open, to open the connection. This opens a terminal in which immediatly should ask for your password. Enter the password.
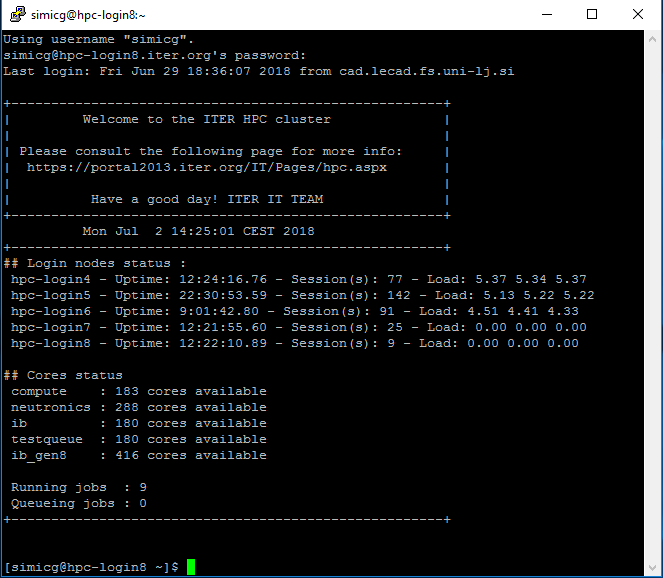
Now before we set a tunnel from hpc-login to io-ls-titan we will go and
start the VNC server on io-ls-titan.
Write the following command:
$ ssh io-ls-titan
Accept the key-print if there is a message about it and enter the password if
you are prompted for it. Now we will setup the VNC server by running
/opt/TurboVNC/bin/vncserver:
[simicg@io-ls-titan ~]$ /opt/TurboVNC/bin/vncserver

You will require a password to access your desktops.

Password:
When you run the VNC server for the first time, it prompts you to set up a password with which you will access the desktops, created by VNC. Enter a password and do not forget it:
Verify:
Would you like to enter a view-only password (y/n)?
Write n:
Desktop 'TurboVNC: io-ls-titan.iter.org:2 (simicg)' started on display io-ls-titan.iter.org:2

Creating default startup script /home/ITER/simicg/.vnc/xstartup.turbovnc
Starting applications specified in /home/ITER/simicg/.vnc/xstartup.turbovnc
Log file is /home/ITER/simicg/.vnc/io-ls-titan.iter.org:2.log
This started a VNC server on display :2 and created a configuration
directory in home directory. In this case the display number is :2, so
now kill the server with the command:
[simicg@io-ls-titan ~]$ /opt/TurboVNC/bin/vncserver -kill :2
  Killing Xvnc process ID 7413
We will now edit the configuration file ~/.vnc/xstartup.turbovnc so that it
starts a desktop session when the VNC server starts.
Perform the following commands:
$ cd ~/.vnc
$ mv xstartup.turbovnc xstartup.turbovnc.orig
$ echo "exec env PATH=/opt/trinity/bin:\${PATH} starttde" > xstartup.turbovnc
$ chmod 755 xstartup.turbovnc
Now restart the VNC server and don’t forget the number of the display on which it starts. The output this time will be different:
[simicg@io-ls-titan ~]$ /opt/TurboVNC/bin/vncserver

Desktop 'TurboVNC: io-ls-titan.iter.org:2 (simicg)' started on display io-ls-titan.iter.org:2

Starting applications specified in /home/ITER/simicg/.vnc/xstartup.turbovnc
Log file is /home/ITER/simicg/.vnc/io-ls-titan.iter.org:2.log
Now exit the io-ls-titan node:
[simicg@io-ls-titan ~]$ exit
logout
Connection to io-ls-titan closed.
Note
The display number of VNC server also tells us on which port it will
broadcast. In this case, the display number is 2 so the port number
on io-ls-titan shall be 5902.
We will now perform a SSH forwarding from io-ls-titan to
hpc-login8.iter.org:
[simicg@hpc-login8 ~]$ ssh -g -L 5902:io-ls-titan:5902 io-ls-titan
Last login: Mon Jul  2 14:30:36 2018 from hpc-login8.iter.org
Note
In case the display number of VNC server is not 2 and for example is
10, the command would be:
[simicg@hpc-login8 ~]$ ssh -g -L 5902:io-ls-titan:5910 io-ls-titan
Now the connection is established and we can connect to the io-ls-titan
login node via TurboVNC viewer in Microsoft Windows. Do not close
the PuTTY terminal.
4.7.5.2. Running TurboVNC viewer in Microsoft Windows
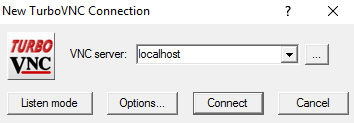
Start TurboVNC viewer by pressing Win key and writing TurboVNC.
Click on TurboVNC Viewer. In the VNC server write
localhost.
A prompt for the password will show up. Enter the password you set for the
VNC server.
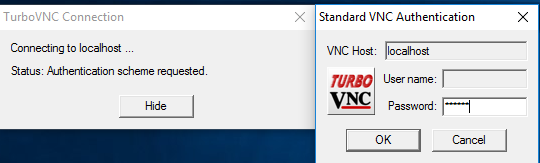
A session will open up and you are now connected to io-ls-titan.
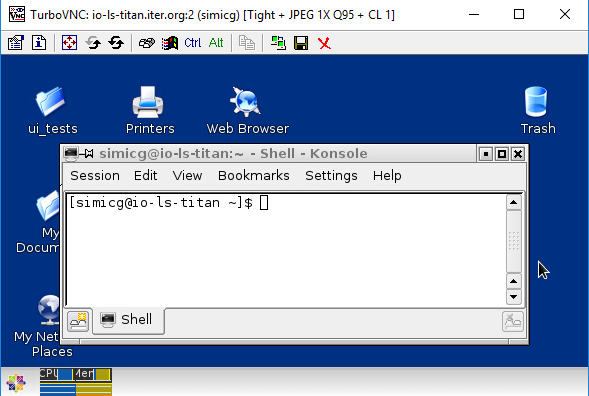
4.7.5.3. Running SMITER in TurboVNC
Open a terminal, by pressing Ctrl-t in TurboVNC viewer. Write the next commands:
module load smiter
smiter

4.7.5.4. Running SMITER with virtualGL in TurboVNC
To run SMITER with VirtualGL open a terminal with Control-t in
TurboVNC viewer. Write the next commands:
Xorg -nolisten tcp :11
Note
The value :11 might be already taken, so if the command fails to run for
that value, change the value by adding 1 (:12) and run again until it
works. Remember the value with which you ran the Xorg command.
Open a new tab in the terminal by pressing Control-Shift-n. In that terminal write the following command:
$ /opt/VirtualGL/bin/vglrun -d :11.0 /home/ITER/kosl/smiter/salome/smiter
Note
The value -d :11.0 corresponds to the value with which you ran Xorg.
That means if you couldn’t run the the previous command with the value
-d :11.0 then run it with the value you ran Xorg.